To begin this post of epic garage renovation, let me dig back a year ago to the beginning of the beginning. When Jesse and I first purchased the Garage of Rock it was truly a disaster. Half Concrete/half dirt floor, junk everywhere, poor lighting, all the characteristics of a poor garage – EXCEPT… for the size.
The garage is huge.
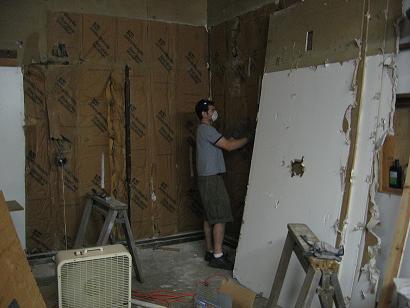
The first thing we did was put up a rock climbing wall (obviously). Here’s a picture of the garage post rock wall, pre anything else.

A year ago, I had a complete concrete floor put in. It was quite the improvement!! Next up, Brian installed some new lights and the House of Rock community quickly filled up every available inch of the garage with junk. Here’s the Garage of Rock about 45 days ago:

This winter, I decided to get a new driveway. It only made sense to accompany this with new garage doors. And obviously, if I have to clean up for the new door installation I might as well keep cleaning up and put down an epoxy coating on the floor. Thus:
Step One: Clean the garage, clean it a lot.

After we moved all the junk, Brian power washed the floors to begin prep for the epoxy. You’ll note that in this picture the driveway has been torn up and replaced with gravel.
Step Two: Acid etch.

Whenever you are putting epoxy onto concrete, it is critical to first etch the concrete so that the epoxy will stick better. A few things to note in the picture above. Firstly, note the six inch clamp that I’m using to hold up the garage door. This was necessary because the garage doors were horrible. Secondly, note my sweet fashion skills. Let’s get a closer look.

Dear Ladies,
Take a deep breath. I know this picture really excites you. It’s probably hard for you to see so much masculinity in a single photograph. My manly ripped jeans, beltless tuck, goggles, and over-sized gas mask probably have you emotionally flustered. Don’t be sad, there’s plenty of me to go around.
Yours,
Mike D.
Step Three: Lay Down the Epoxy and Get New Doors Installed!

Painting the floor was not trivial. First, we laid down an adhesive and then Brian painted it with the epoxy – adding glitter flakes for accent. Sadly, Brian was a bit too aggressive with the flakes and it ended up looking kinda crappy. So, upon my return from my Calgary/Chicago/Houston trip, I sanded the whole floor and applied a thick second coat of epoxy with much more success.

The garage door guys came a few days later and installed the new doors which work beautifully and don’t need six inch clamps to hold them in place!
We’re slowly repopulating the garage, this time with a bit more organization. And next spring once the temperature warms up a bit I’ll finish sheet rocking the walls, add some spackle, and paint (color recommendations welcome)! Next I’ll add some baseboards and a small new workshop? And then? DONE.
I’m very pleased with the progress so far, and I can’t wait to iron out the final details.
There are two obvious uses for each of the garage bays. In one bay, set up a drum kit, amplifiers, and guitars. In the other bay, a weight bench and a rack full of plates. You can be shirtless for both activities, weather permitting.
One step ahead of you Ted:
[img]http://www.mikedidonato.com/images/2010/11/garage7.png[/img]
Way to tease with the talk of new garage doors and then no pictures!
Au Contrair Mr. Abad, that last picture has the new doors. Note the windows and the lack of the wooden scaffolding on the right hand door.
Although you make a good point, I’ll post some better door pictures.
ha! look at that! ironically, i looked at the two pictures in that direction and didn’t notice the windows!
I would suggest on the walls. Put Diamond plate on the bottom 2 feet or so. This way when the wayward lawnmower, ladder or in some rare cases a car bump against it it won’t smash the sheet rock. Plus it would look pretty bad ass with a garage encassed in diamond plate. Example…Appologies for the site…but its the best example I could find.
http://media.photobucket.com/image/wainscoting%20with%20diamond%20plate/mrseward/yhst-89776650511186_2115_71891291.jpg