Framing a shed is not challenging. There are four parts:
1. measure and cut everything in advance
2. buy a nailgun and air compressor
3. use the nailgun
4. take frequent snack breaks
This is one of those cases where the prep takes as much time as the actual construction. Jen and I spent a full day measuring and cutting in preparation. Jen measured and marked each piece as I used the chop saw to cut. Every single one was flawless – except for the one piece that I happened to have measured. Ha!
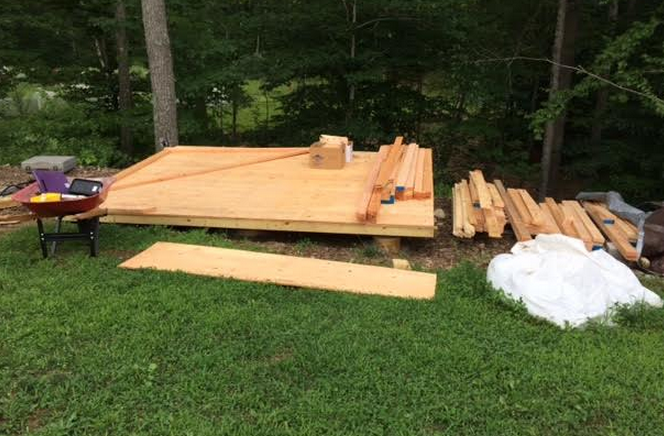
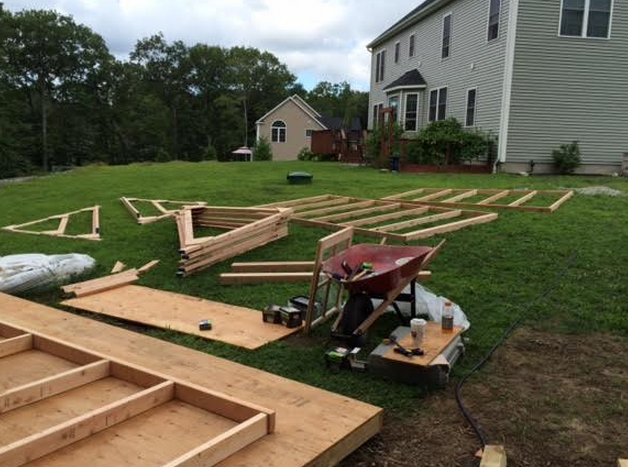
We setup all the wood at the floor and used the floor as a table for construction. To make our life easier on the trusses, I setup a jig on the floor that was preset to the angle of the roof. The roof is 50° off plumb on each side – or a 110° roof. While a 45 degree roof would have made construction easier (everyone loves 90 degree angles) I’m glad we stuck with the 110. Forty five degree roofs are more common for saltbox type sheds – 50 is better for a colonial style and easier (though only marginally) for shingling.
My father-in-law came over to help with the construction. I also purchased an awesome 33Gal Air Compressor on Craigslist for $120! DAAAAANG! What a deal! My neighbor loaned me a framing gun and I bought 1000 nails. Literally a thousand nails. Nail gun framing nails don’t come in quantities much less than this. I did not run out of nails.
With the tools and an extra set of hands the framing commenced!
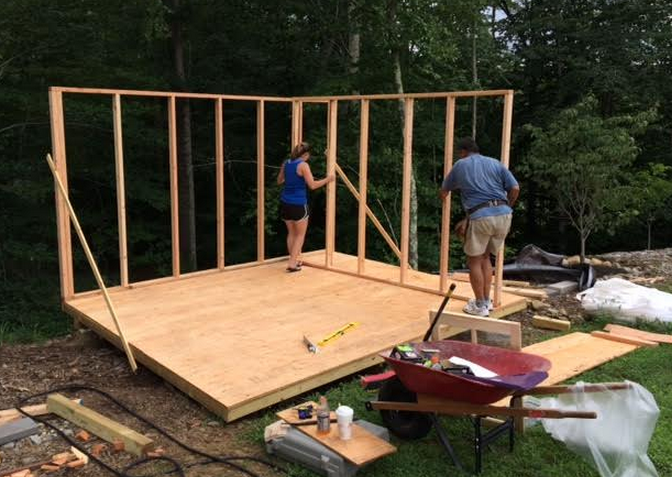

As I mentioned in the previous post, I modified the plan designs so that it had four windows and a door on the front side instead of the gable side of the shed. The door is 48 inches wide and just six feet tall which works great for me but anyone taller will constantly bump their heads.
RAISING THE ROOF!!
We built all the trusses before putting up the walls. And just like the walls, it was a simple task to get them up and nailed into place.

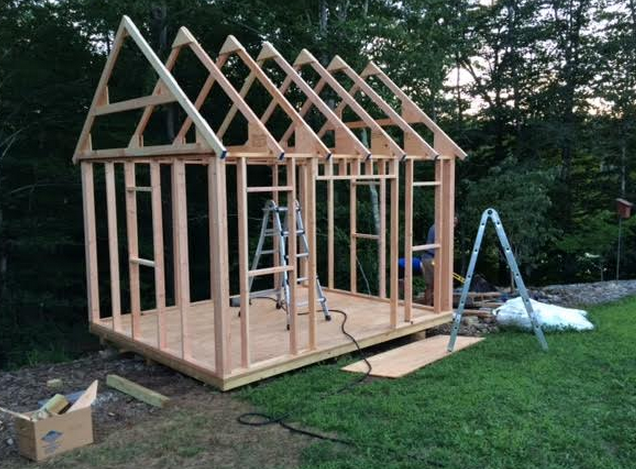
All the framing took place in a single day!
I call this next part the Error Amplification Phase. Even the tiniest of errors ended up escalating exponentially. 1/8″ gap difference across the door frame? Prepare yourself for 30 hours of rework.
Thankfully there were only three or so errors besides that door one that ended up costing me later.
1. I made the floor 10ft x 12ft. The roof was designed for a slight overhang on each end – but since I made my floor the full width, the roof line extended to about 12 feet 4 inches. Since my roofline lumber was 12′ long and I wanted to plywood the roof without weird-sauce cuts, we had to reposition the end trusses to not overhang and I had to do all sorts of extra crazy trim stuff at the end. Ugh.
2. This one was phenomenally stupid. We centered the edge of the studs not the centers. We should have measured to center. That means come time to put up the plywood walls it was a roll of the dice if they happened to fall on a stud. We were lucky everywhere except for 3 spots where the seam falls NEXT to a stud. Ugh^2
3. My windows were framed EXACTLY TO FIT. Come on Mike D, get it together! I admit that I’m a bit arrogant when it comes to expectations of the quality of my work, but sizing a window frame to 22 x 26″ for a window that is manufactured at 22 x 26″ is not a bright thing to do.
Next up? The walls and the roofing.