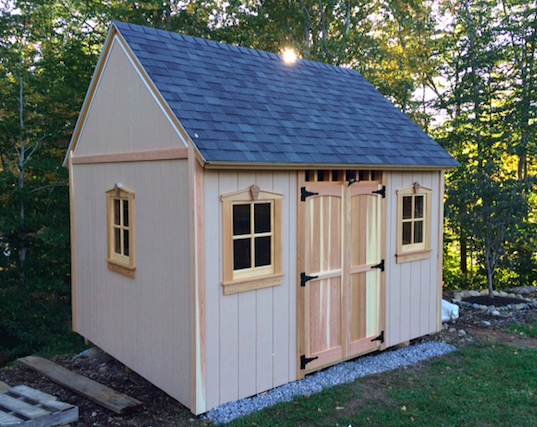
My own personal Great Pyramid of Giza, this shed has undeniably been the largest construction adventure I have embarked upon. Thankfully I’ve had help at almost every stage of this project – note: Perhaps I shouldn’t compare my shed work to the Pyramids. My help was certainly not forced slave labor burdened by the brutal Saharan sun (though occasionally, they may disagree).
The almost finished shed
Schedule: Officially, we broke ground for the shed on July 25th. And while I’m still not completely done with the work, I’m close enough to start posting this recap. Right now we’re at about week 11. The Goal: a 10ft x 12ft shed The Budget: not-defined, but I had mentally prepared for about $2000-$2500. I was wrong here. The Placement: the edge of our yard abreast a precipitously steep hill
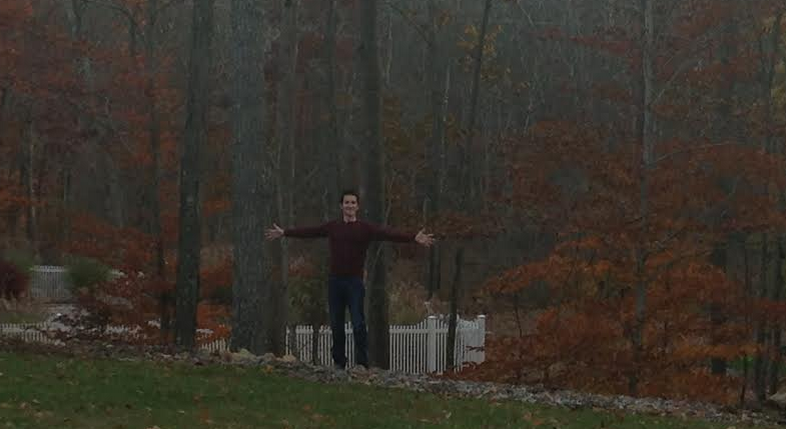
I’ll probably mention the precipitously steep hill many times. NOTE: this picture was taken in the fall long before the start of construction
Original research:
I started by taking out some books from the library and searching Houzz to try and define what kind of shed we wanted to build. Sander loaned me an excellent shed book under the “Build like a Pro” series; within which was a link to shed plans that were purchasable from a company called Better Barns. I purchased a $35 dollar set of plans for a simple colonial style shed.
The Plans:
The plans were… okay. The covered the general construction methods but the Bill of Materials was incorrect and there were a bunch of details missing from the plans. The plans also needed to be modified rather significantly for our property. For example: I changed what side of the shed had the door and increased the number of windows.
And now? We start.
Step 1: The Foundation
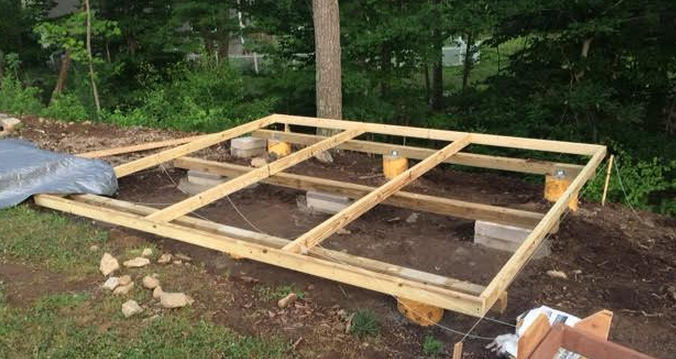
I planned a concrete pillar foundation. Because the shed was at the edge of a precipitously steep hill, I needed a method to ensure stability and levelness. Concrete pillars seemed to make the most sense. Dad D came down for a weekend to assist. The goal was six concrete pillars. Three in front, three in back. The middle of the shed would be simply supported by bricks. My plan was to bury the six concrete pillars 42″ deep – that’s the frost line. BUT: we hit rocks that limited our depth. I’m not concerned.
Dad D positions the concrete forms
The floor frame of the shed is assembled from 2×4’s at 12 inch centers mounted atop three 4×4 rails.
The Frame!Fun fact: measure corner to corner to ensure squareness. Then lock it down with some strapping before attaching all the joists
5/8″ CDX plywood covers that. Was it level? Absolutely. Was it square? Perfectly. All the materials for the floor and subfloor is pressure treated.
Critical advice for others attempting this:
1. Use a transit for leveling purposes. It was a lifesaver a thousand times over
Beautiful!
I’ll post the framing story next! Framing is the part of the project that I like to call “Everything goes so smoothly because details aren’t yet important!”
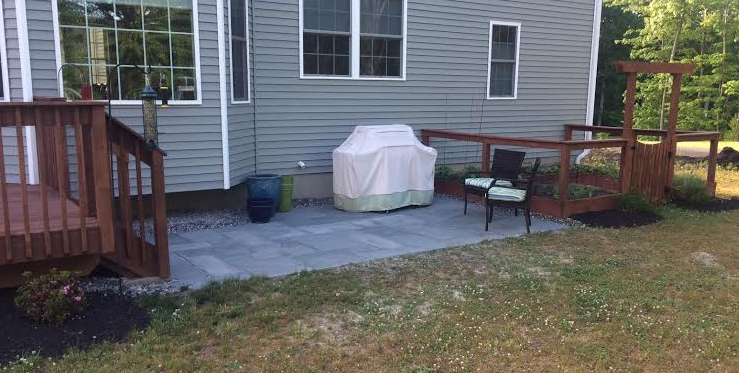
After the completion of our vegetable garden, we decided to fill the area between the garden and our deck with a stone patio. Once again, we were cursed by beautiful images of blue stone work on pinterest and Houzz. This project grossly exceeded my construction expectations by about a factor of five – it wasn’t hard labor, it was mind-numbing frustration rooted around an unexpected necessity for precision.
The Completed Patio
Online resources are pretty helpful for patio construction. The steps are straightforward:
1. Dig
2. Gravel/Level everything
3. Compact
4. Put down sand
5. Place stones
6. Joint sand
These steps surprisingly don’t mention headaches or re-doing work multiple times. Both these items should probably be in there.
We decided on a 150 square foot area. At a local quarry we ordered all our materials. The folks there did the quantity calculations for us. The trickiest part was picking out the type of stone. As we walked the lot we found a beautiful cut stone that was consistently 1 inch thickness.
us: “Ooh! we like this one!”
Store guy: “of course you do. It’s the most expensive of the ones we’ve looked at”
Geesh.
Almost all of a patio’s cost comes in form of the stone and transportation fees. Take the sand for example $22/ton. We got one ton. No big deal! The stones cost anywhere from $4ish per square foot to $12ish per square foot. Ours ended up being about $8.00.
$1200 in stone
$250 for delivery fees
$100 for processed gravel
$65 for a compactor
$60 for joint sand
$22 for sand
Total cost: $1697
Quotes for having a similar patio done for us came in at about $4000. Worth the work? Maybe.
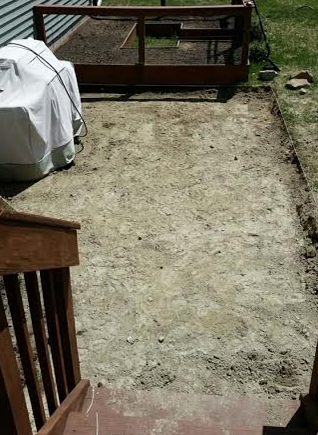
PLANNING
We planned aggressively. I measured out the plot and put in stakes with strings so we could define the area. I left about three inches gap on two of the sides in case the stone dimensional tolerance was poor (it was).
Annoyance level: low
Three inches was enough on two of the sides, I wished I’d given myself an extra inch on the other two sides. It worked out fine, but could have been a bit easier.
Meanwhile, Jen put together a stone design based on the options available from the quarry. We used excel.
ta-da!
We ordered only those stones we needed. This is the only way I’d ever recommend doing a patio.
Annoyance level: medium
We are NOT stone layout experts. It took about five iterations before we couldn’t find any obvious flaws.
DIGGING
I figured the digging part would be the hardest. Nay. That was the easiest. In general websites everywhere recommend at least 4 inches of gravel (or processed gravel), one inch of sand, and then your stone. With one inch stones that meant I needed to dig down 6inches. Sander came over to help and the whole thing was dug out in about 3 hours.
We lucked out here. That “At least” 4 inches of gravel depends on the quality of the earth under your sod. We had a clay-like sand which is PERFECT. If you have 10 inches of fluffly top-soil you’ll have to go deeper than 4 inches.
We also didn’t have too many rocks. Those that we did have we were able to get around. Overall, this really wasn’t too bad.
Annoyance level: medium-low
Don’t forget to find a place to put the dirt you dig out. It adds up really quickly. Thankfully, part of my yard needed some leveling, so we had a place to dump.
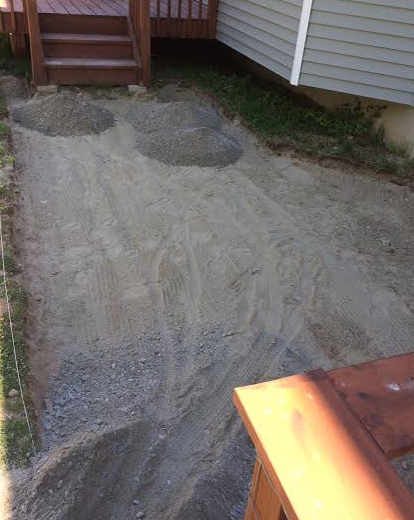
GRAVEL/LEVEL EVERYTHING
THIS IS THE WORST.
Websites recommend using line levels attached to stakes. I was lucky enough to be able to borrow a transit. Still, this was WAY harder than I expected.
Adding the gravel
The “gravel” isn’t really gravel. We used processed stone which was about half sand and half tiny rocks. It worked like a charm. For drainage, you’re suppose to have 1″ of slope for every 10 feet of patio. Our patio was 10 feet wide so the math was simple. Getting the ground equally sloped? Brutal.
I ended up getting a two by four and dragging it all over the place to try and level out the tiny hills and valleys made after compacting. It was strenuous and challenging. Even when everything looked perfect I’d find half inch variances like you wouldn’t believe. Finally, I got close enough that I was happy and moved to the next step only to realize that the stones would rest too low. The point where I had my transit happened to be a low spot in the lawn. I had to add another 1/2. UGH!
I’d plan on having your stones extend about a quarter inch ABOVE the grass. That would make life easier. Even after raising the bed, I ended up a quarter inch lower than I should have been.
Annoyance level: HIGH
That stupid leveling was the worst. I hated it.
Before Compacting
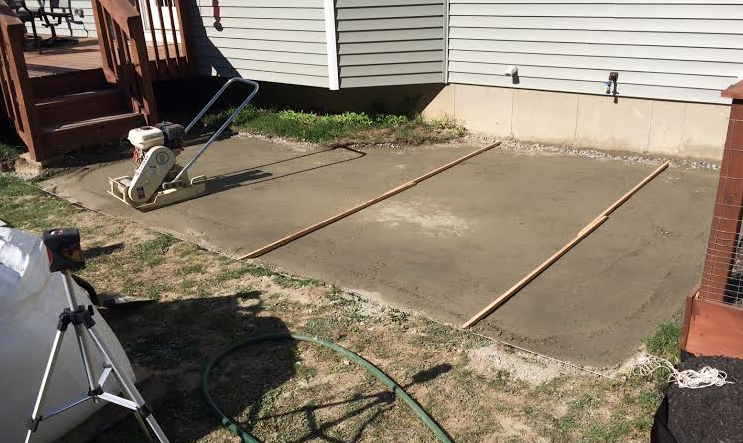
Using the compactor was fun and not particularly hard. It required some muscle to move the thing in any direction other than forward, but otherwise was a very convenient certainly worth the rental fee (FUN FACT: we rented on a Saturday. Because the place was closed on Sunday and Memorial Day we got three days for the price of one. Much needed considering the project felt like it never ended)
All leveled up! Finally.
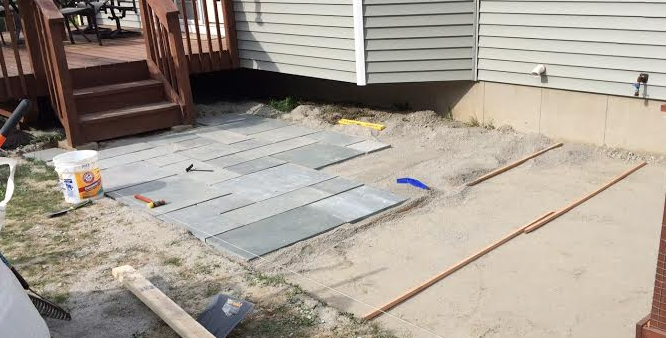
ADDING SAND
and PLACING STONES!
This was yet another step I thought would be easy that definitely wasn’t. Everyone recommends using two pieces of conduit and a 2×4 to level out the sand at a very perfect 1 inch. I used wooden stakes instead – it worked but was occasionally annoying. Don’t skimp, get conduit.
You gotta go sector by sector. Put some sand, level the sand, place the stones.
In process
The problem is that the stones aren’t perfectly sized so every single one has to be leveled and shimmied and adjusted and knocked and adjusted and shimmied. What I thought would be a drop and stop sort of event turned out to be stupidly maddening.
My favorite was the stone that took 20 minutes to place and get level; and then (of course) I realized I had it oriented incorrectly. SO DUMB.
More progress
Tools used for stone placement:
Level
Wide spackle knife
Rubber mallet
Spade
The placing of the stones took a solid 4-5 hrs.
Complete!
Filling the Joints
We bought polymetric sand to fill the joints between the stones. The sand works in a fairly simple manner:
1. Put in the cracks
2. Wet
3. Let sit
Success!
BUT WAIT! there is a very small caveat: after you put the sand in the cracks but before you wet it? You need to make sure there isn’t any sand on top of the stones. This is NOT EASY. I used a shop vac and spent two hours all leaned over with a crooked back cursing my existence.
Honestly? There’s probably an easier way to do this. I most certainly did it wrong.
Setting the sand
Annoyance Level: Really high. Oh man, my back hurts thinking about this.
The Completed Patio
Overall, I’m stoked to have constructed our patio. It will get great usage as an epicenter for grilling and chilling out. I’m pleased and if I had to do it again, I’d probably do it myself – though if there’s a next time I will plan a solid four days for the work.
Pinterest is the worst thing to ever happen to do-it-yourselfers. Beautiful pictures of amazing results by people who don’t document the annoying parts of the process. This inspires over-ambition and all sorts of extra hours of headaches.
Then you go online and try to find help and there are two varieties:
1. Detail lacking guidelines that don’t provide enough steps
2. This Old House that builds everything with so much effort and professionalism that the end results could survive the apocalypse but would take an average person an eternity to build
This series of how-to’s is going to be type #3. Real explanations of the annoyances that come with not being Bob Villa in the hopes that you won’t screw it up as much as I did.
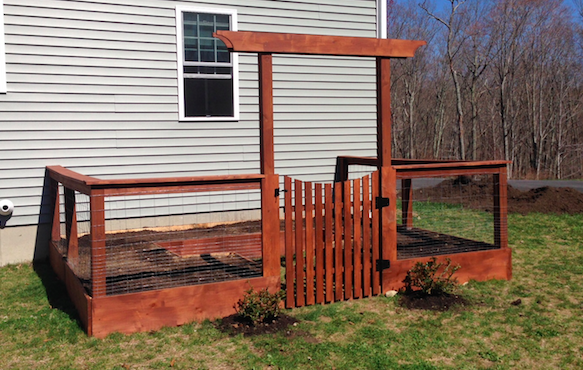
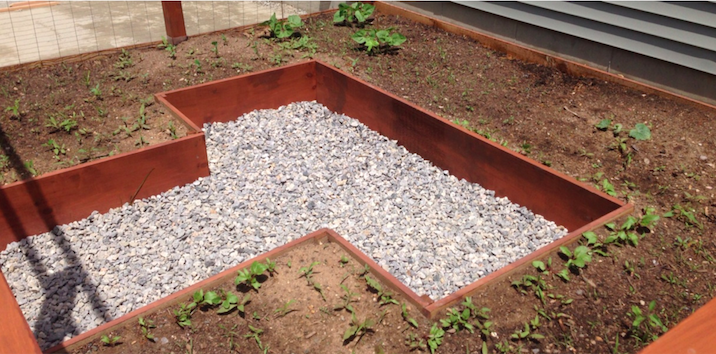
Vegetable Garden
Jen and I decided to build a fenced-in raised bed garden. After much deliberation we wanted to go for a pinterest style complicated horseshoe shaped garden to allow no arm-reach beyond three feet for weeding and vegetable picking. (side note, it turns out 3 feet is kinda useless for veggie gardens. Almost all seed packages recommend 24 inch spacing, a 48″ bed width would have been smarter)
First: The finish product
Online recommendations for raised bed gardens:
1. Mark out your area
2. Buy cedar planks
3. Screw everything together
4. Done!
The more advanced sites suggest fence posts secured in concrete and really tall (8ft) fence varieties to prevent jumping deer. Forget that junk. We did four foot fences – no concrete. Totally good enough for a small garden.
Overall how’d the project go for us? Eh.
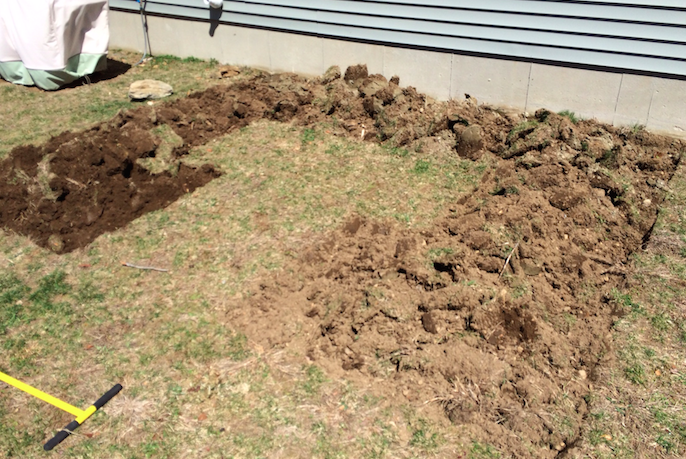
PLANNING
First I made some sketches and planned out materials. I used graph paper and planned aggressively. Jen and I found a spot in the yard. We laid it out with sticks, measured twice, and then turned the soil around the outline.
Annoyance Level: Low. we had some rocks, but so far so easy. Just make sure you use a spade style shovel. Once we got under the sod it was easy. We also didn’t level anything (*Remember this for later*). If you had to level your yard this part would stink
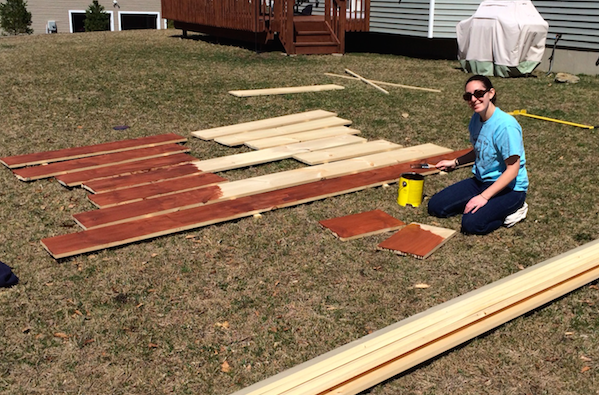
SUPPLIES
Next we bought some supplies. My calculations were pretty awesome. The problem occurred when we went to buy the wood. I had wanted to stack two 1×6 cedar planks to make a one foot tall raised bed.
When Sander and I arrived at the lumber yard I learned that they had 1×12 boards. PERFECT! except they weren’t cedar they were pine. No big deal right? Wrong. Cedar doesn’t rot. Pine does.
This was dumb.
In order to compensate for the 1×12 boards I tried to re-do my math on the spot and calculated wrong. So we bought one too few 10foot boards.
This was also dumb.
Annoyance Level: High.
What I should have done is called the lumber yard in advance and asked them if they had what I was looking for. That way I could do the math while not under pressure and I could double check my numbers. We were able to make due with the boards we had by better utilizing scrap, so I didn’t have to go back to the lumber yard. But it required an extra seam in the garden wall which I didn’t like. The pine error will be extra extra annoying when I have to replace all the pine boards in a couple years because of rot.
FRAMEWORK
I got pressure treated 4×4’s for the corner posts. Pressure treated stuff shouldn’t really be used for vegetable gardens because they are loaded with all sorts of nasty chemicals. We got around this by wrapping each leg in plastic. The Jury is out on whether this was a good move or not. I’m hoping I never have to replace the fence posts.
The holes: I wanted to go down 24 inches with a hole post digger and quickly gave up and settled for 17inches. Why 17? Because that’s about where I started hitting an absurd number of huge rocks. 17 inches was good. 12 inches probably would have been okay.
Annoyance Level: Medium. The digging was definitely not as bad as I’d expected. But probably only because I relaxed my installation specifications. I definitely didn’t do the concrete. I just dropped the 4×4’s in the hole. I’m totally okay with this.
The measuring is SO important here. When you dig your holes, don’t measure to the edge of your construction – measure center to center. After I dug my holes and stuck the boards in I realized I had to lined them too narrowly by about an inch each. I did this with a trowel and it was stupid.
Also, remember how I didn’t level the yard? It turns out the north-side is about a half inch off from the south side. I measured the heights of my corner posts off the ground – I should have used a transit or a line level. I was lucky that the tilt didn’t create a visual problem, but it definitely resulted in some weird-sauce board alignment issues.
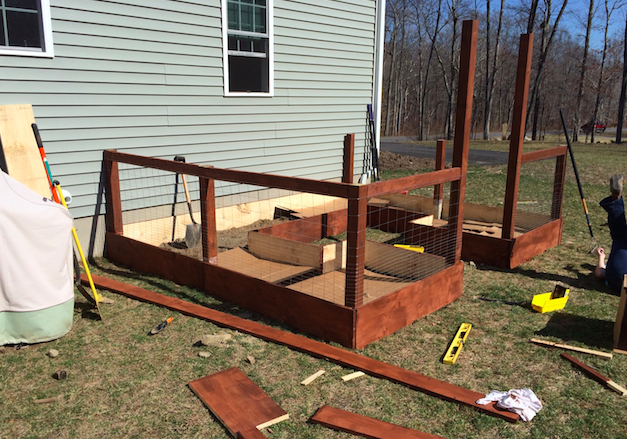
CONSTRUCTION
Annoyance Level: High
THIS IS IMPORTANT: When you have a framework that’s locked down, don’t be an idiot by cutting all the connecting pieces in advance. I trusted my measurements as law. But when I secured the corner posts in the ground I found that the dimensions drifted… Just slightly enough to be really annoying.
I used nails to put everything together. I would recommend nails for connection up to a solid fence post, but for every other connection I should have used short screws. The problem was that since my boards weren’t perfectly sized – nailing some pieces together would pop other joints. It was frustrating.
Because we wanted the chicken wire behind the boards, we had to put the mesh in place as we built the structure. We used a staple gun and it was definitely the right choice. Super easy.
We also ran a separate piece of chicken wire into the ground 6 inches to prevent burrowing animals. This wasn’t as annoying as expected.
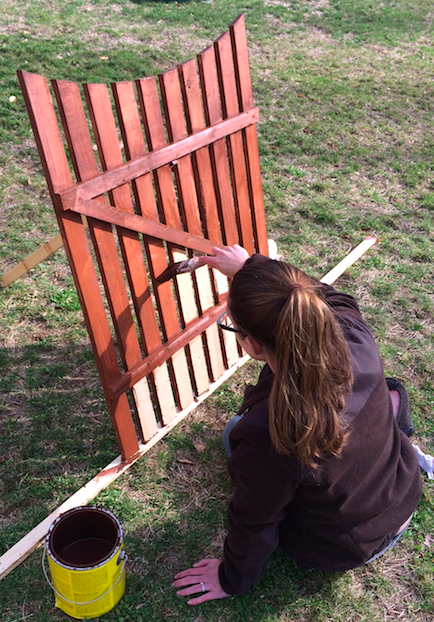
THE GATE
So easy! For this we measured the door opening and laid out some strapping on the floor of our basement using little 1″ spacers to make everything aligned really nicely. I used a pencil attached to a string that was secured with some duct tape a few feet away to draw a nice radius along the top. I used a bandsaw to cut each board and then we nailed everything together.
We used a cheap spring loaded gate latch that I bought at Lowes. I worked ok. I had to adjust it in order to make the joints work.
Annoyance level: Low. The only thing I would have changed is the use of screws instead of nails and I would have had the door sit tighter in the frame. I left about an inch on each side. A half an inch on each side would have been fine and would have made the connection latch work a bit better. I bought the latch AFTER we built the gate. This is the wrong order.
Once the construction was complete, we layered the bottom of the garden with newspaper and cardboard (apparently this is useful; I don’t know why). Then we put down a layer of compost. Finally, we mixed leaf mulch with top soil to fill the first of the box. We planted some veggies and eventually, decided to put some gravel down on the inside path. We used some landscape fabric to prevent weeds.
BOOM. Done.
Total price? About $350.
These better be the most delicious vegetables ever.