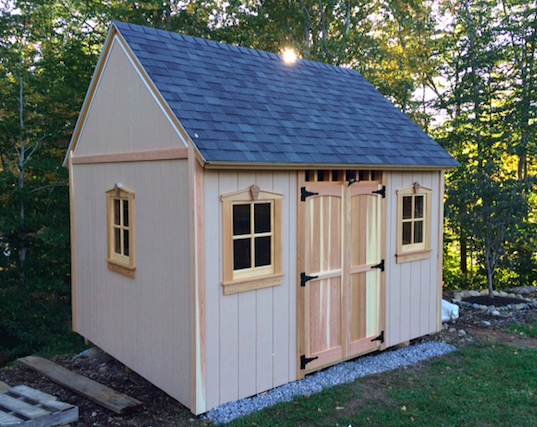
My own personal Great Pyramid of Giza, this shed has undeniably been the largest construction adventure I have embarked upon. Thankfully I’ve had help at almost every stage of this project – note: Perhaps I shouldn’t compare my shed work to the Pyramids. My help was certainly not forced slave labor burdened by the brutal Saharan sun (though occasionally, they may disagree).
Schedule: Officially, we broke ground for the shed on July 25th. And while I’m still not completely done with the work, I’m close enough to start posting this recap. Right now we’re at about week 11.
The Goal: a 10ft x 12ft shed
The Budget: not-defined, but I had mentally prepared for about $2000-$2500. I was wrong here.
The Placement: the edge of our yard abreast a precipitously steep hill

Original research:
I started by taking out some books from the library and searching Houzz to try and define what kind of shed we wanted to build. Sander loaned me an excellent shed book under the “Build like a Pro” series; within which was a link to shed plans that were purchasable from a company called Better Barns. I purchased a $35 dollar set of plans for a simple colonial style shed.
The Plans:
The plans were… okay. The covered the general construction methods but the Bill of Materials was incorrect and there were a bunch of details missing from the plans. The plans also needed to be modified rather significantly for our property. For example: I changed what side of the shed had the door and increased the number of windows.
And now? We start.
Step 1: The Foundation
I planned a concrete pillar foundation. Because the shed was at the edge of a precipitously steep hill, I needed a method to ensure stability and levelness. Concrete pillars seemed to make the most sense. Dad D came down for a weekend to assist. The goal was six concrete pillars. Three in front, three in back. The middle of the shed would be simply supported by bricks. My plan was to bury the six concrete pillars 42″ deep – that’s the frost line. BUT: we hit rocks that limited our depth. I’m not concerned.

The floor frame of the shed is assembled from 2×4’s at 12 inch centers mounted atop three 4×4 rails.
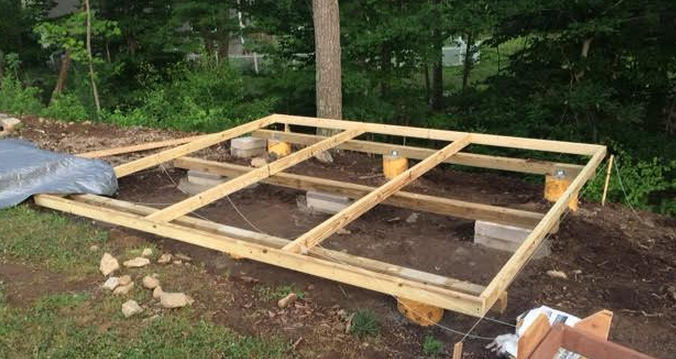

5/8″ CDX plywood covers that. Was it level? Absolutely. Was it square? Perfectly. All the materials for the floor and subfloor is pressure treated.
Critical advice for others attempting this:
1. Use a transit for leveling purposes. It was a lifesaver a thousand times over

I’ll post the framing story next! Framing is the part of the project that I like to call “Everything goes so smoothly because details aren’t yet important!”